Appium Android Setup
One of the most interesting challenges I had to face during my career was when I had to learn how to perform test automation on mobile devices, as we would say in Argentina: “I had to learn with the ember in my hand”.
But what do I mean by “to learn with the ember in my hand”?
There are times when some people have the possibility to take a course, or someone with more seniority is in charge of training you, well that was not my particular case. That is why I thought of putting together this guide so that you can have that support that I would have liked to have and make this path more enjoyable or at least a little less painful.
Java Development Kit (JDK)
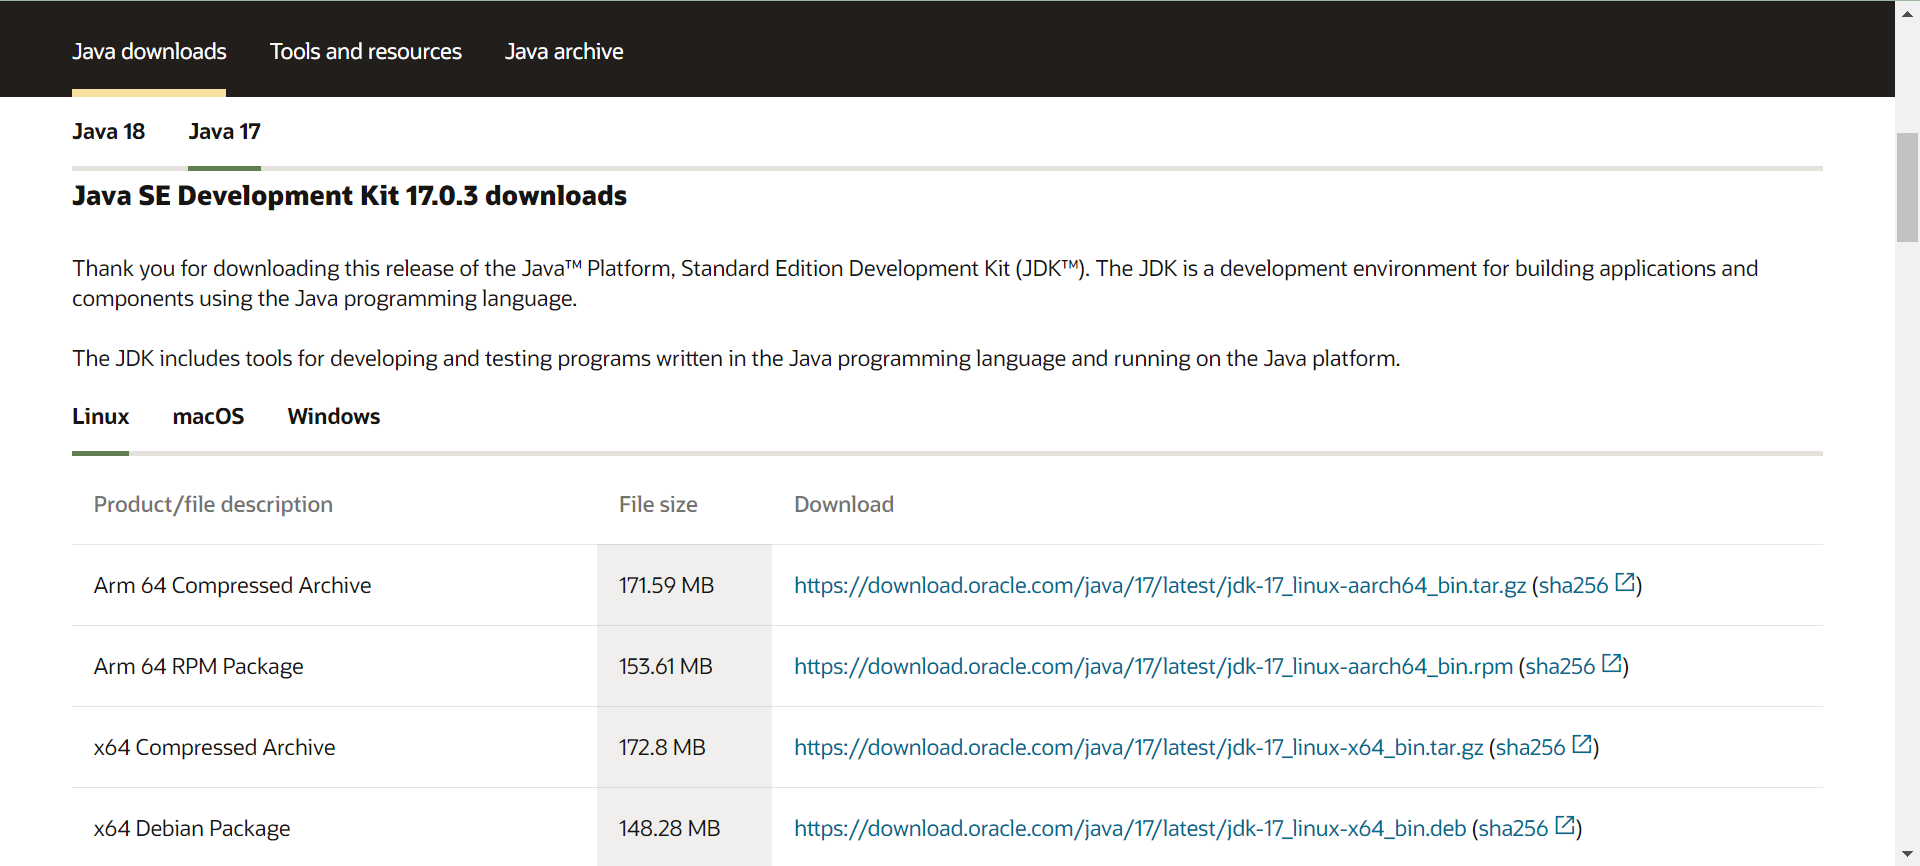
We take as an example the installation and use of Oracle JDK 17, but it would apply to any other version respectively.
We must have the JDK downloaded, installed and we must make sure that we have configured the JAVA_HOME environment variable.
To do this we must access the download link and download according to our operating system and version of Java that we need to use.
Setting up environment variables
On windows
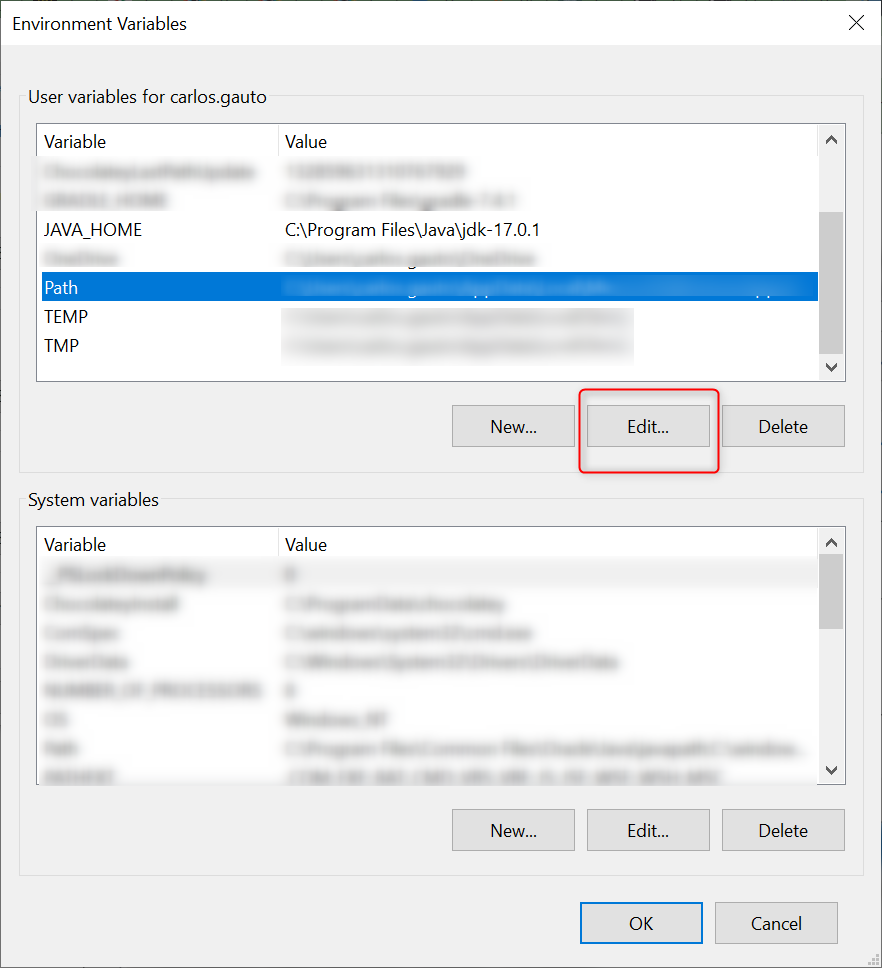
We have to access the Environment Variables menu to add the JAVA_HOME variable with the installation path of the respective JDK.
IMPORTANT: In case it has been added in the system variables section, we will have to restart the system to be able to access it.
In the image below, it is added in the user variables section so that it is not necessary to restart the operating system.
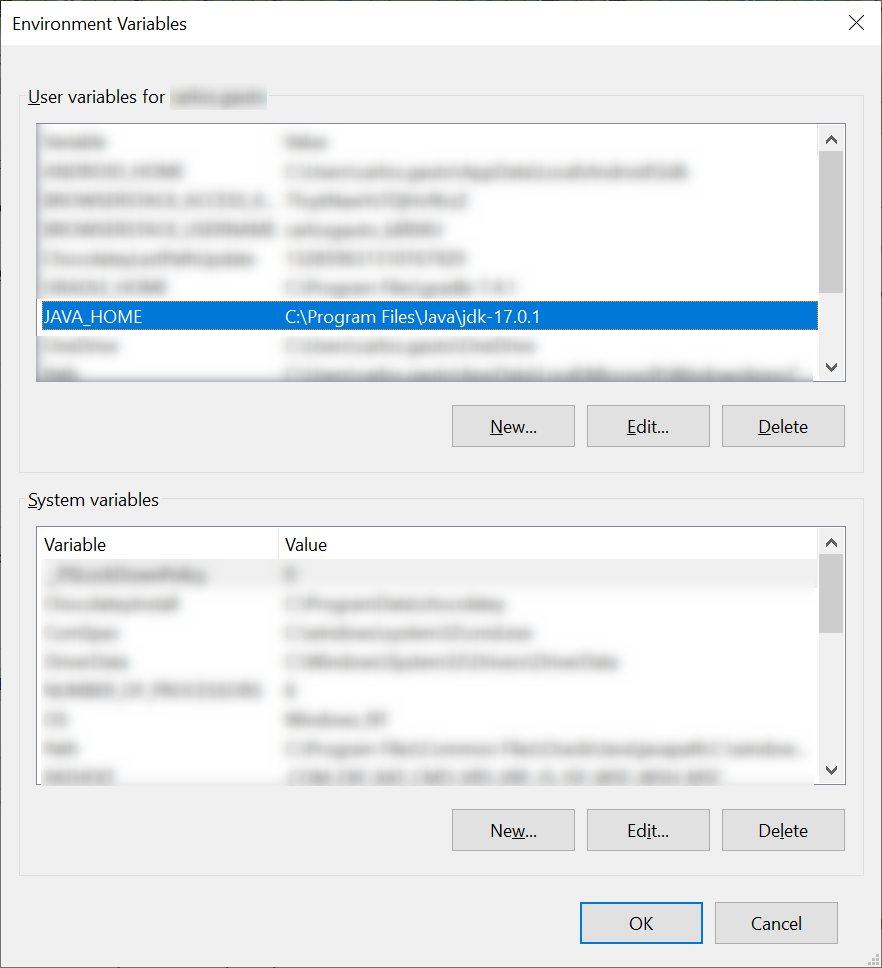
If we are using a terminal, we just have to open it again to validate the correct installation.
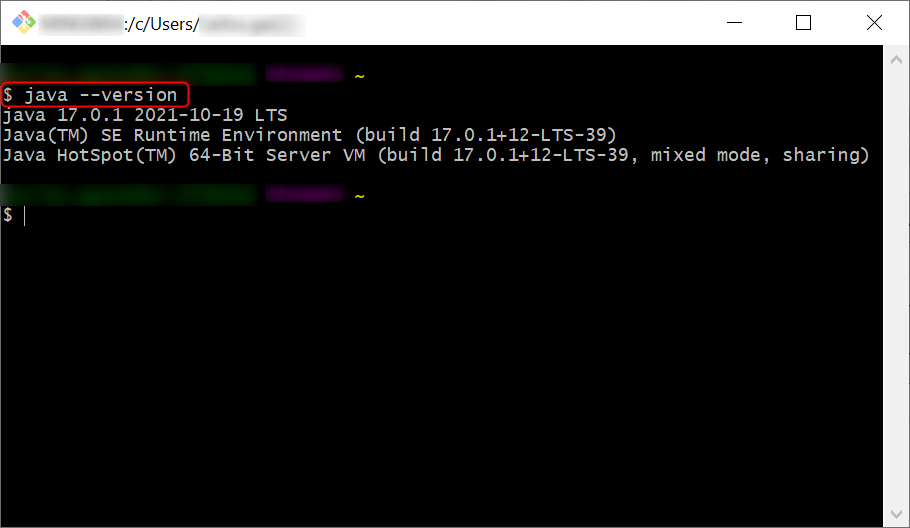
To validate the installation in a terminal we can run:
java --versionWe should see a message similar to the following:
En Mac
open -a TextEdit ~/.bash_profile- Open terminal configuration file ~/.bash_profile || ~/.zshrc and add the following:
export ANDROID_HOME="$HOME/Library/Android/sdk"
export PATH="$ANDROID_HOME/tools:$ANDROID_HOME/tools/bin:$ANDROID_HOME/platform-tools:$PATH"
In Appium Desktop, you have to set environment variables manually.
En Linux
You can use your distribution’s package manager or go to https://openjdk.java.net/install/ to download the JDK.
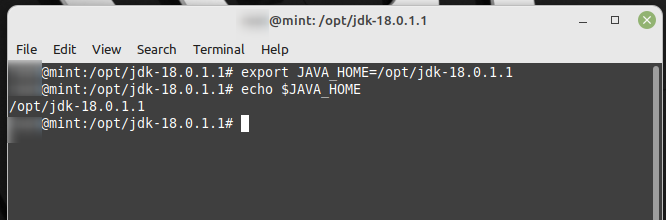
In this example the jdk-18.0.1.1 version was downloaded and placed inside the /opt folder.
In order to set the environment variable we must export the JAVA_HOME variable with the path to where the JDK is located on our system by executing the following command in a terminal.
export JAVA_HOME=/opt/jdk-18.0.1.1To validate if we have configured the environment variable correctly, we can execute the following command.
echo $JAVA_HOMEAfter that, the configured path should be printed on the terminal.
Android Studio
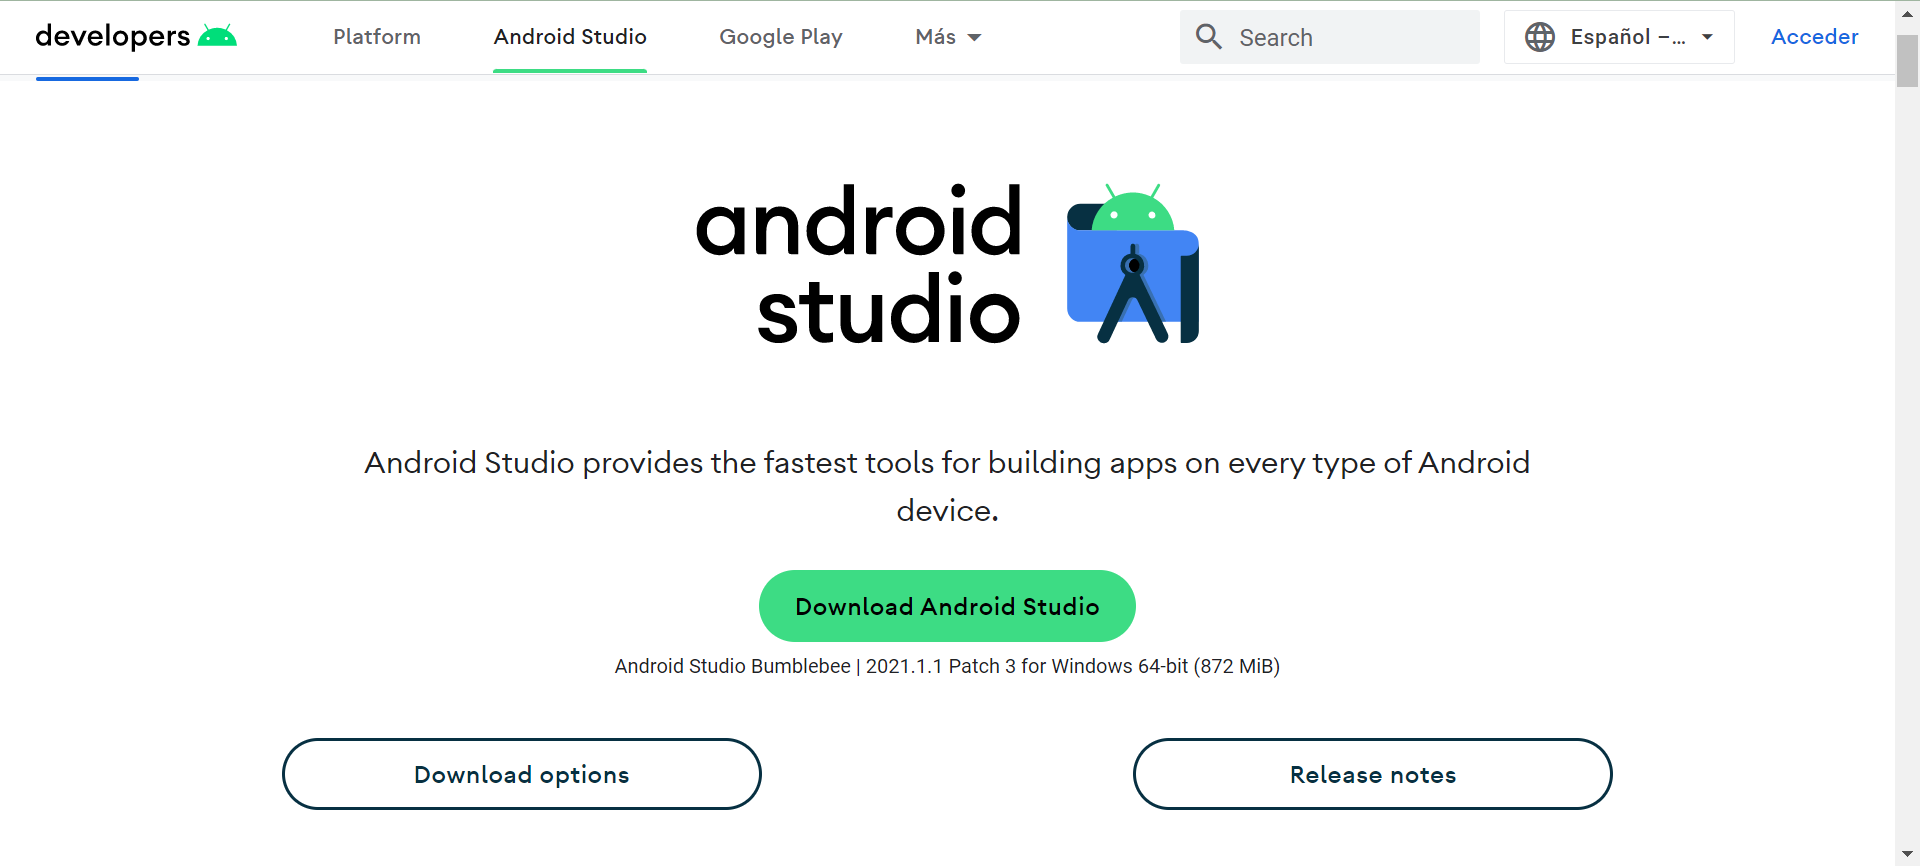
We need to download and install Android Studio to be able to have the different SDKs of the devices we want to emulate on our PC or MAC.
To do this we must access the download link and download according to our operating system.
Windows
At the time of installation it is recommended to select the standard components option.
Once downloaded and installed we must make sure we have the following environment variables configured, for example at user variable level ANDROID_HOME with the path where the Android SDK was installed.
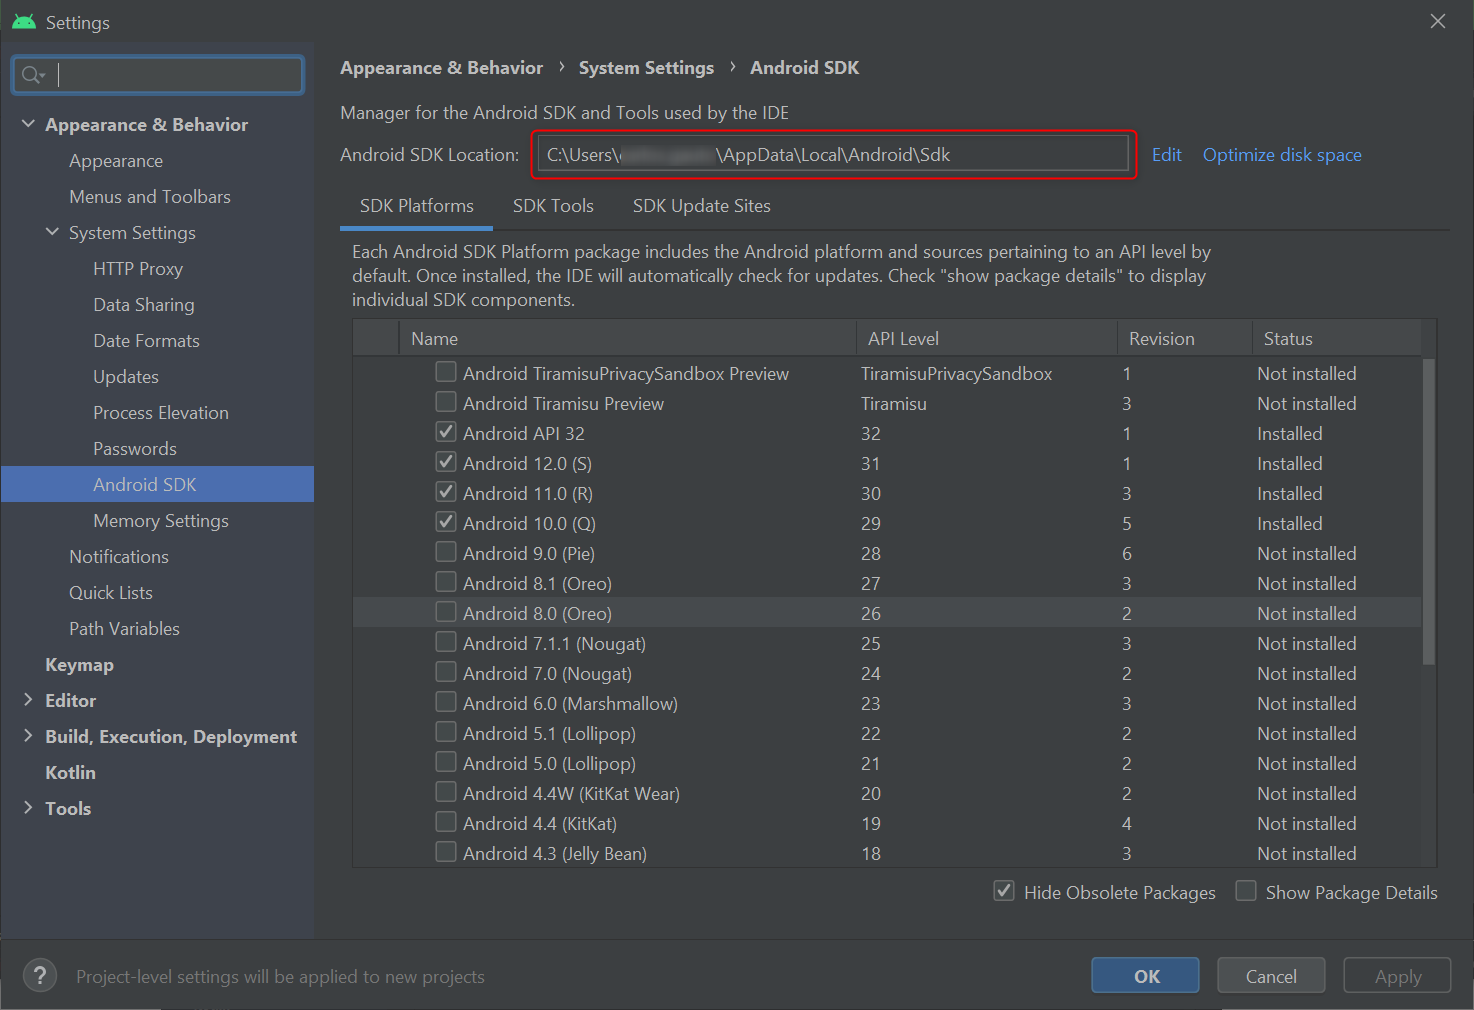
To find out the installation path, inside Android Studio we can access the menu: Tools and then SDK Manager.
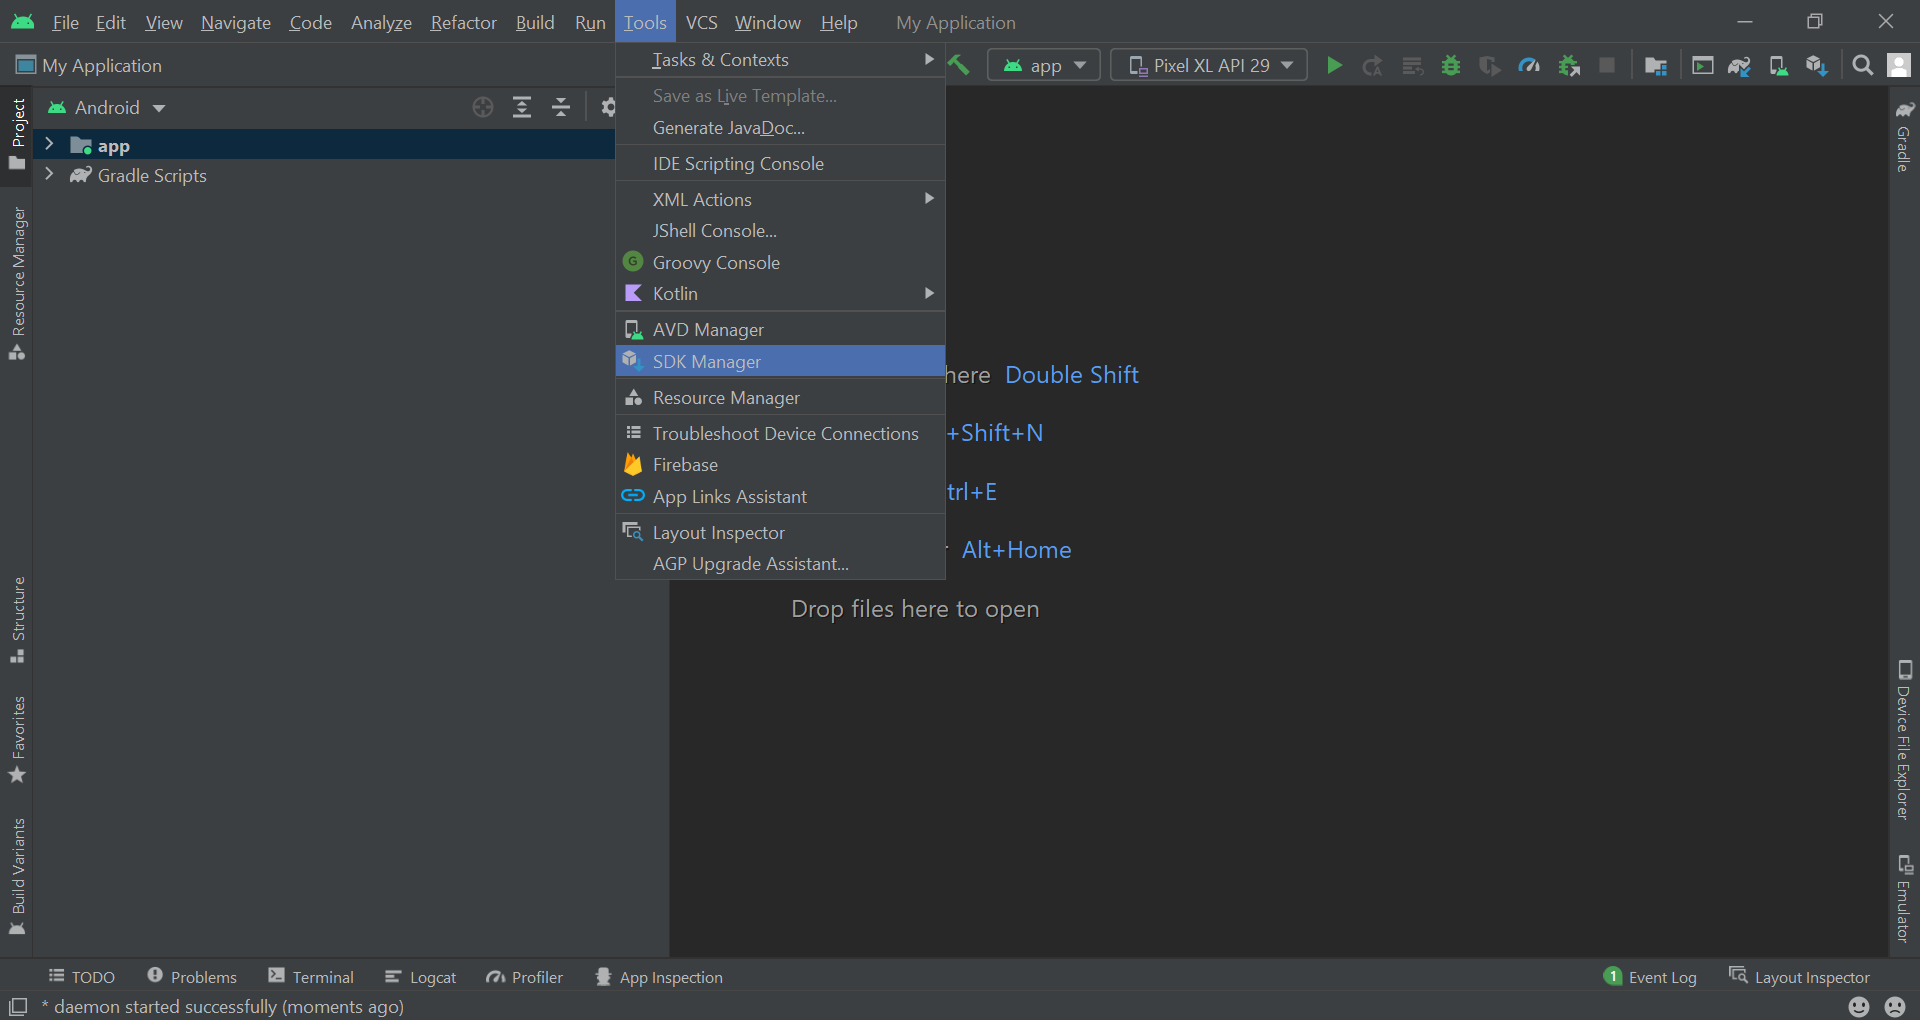
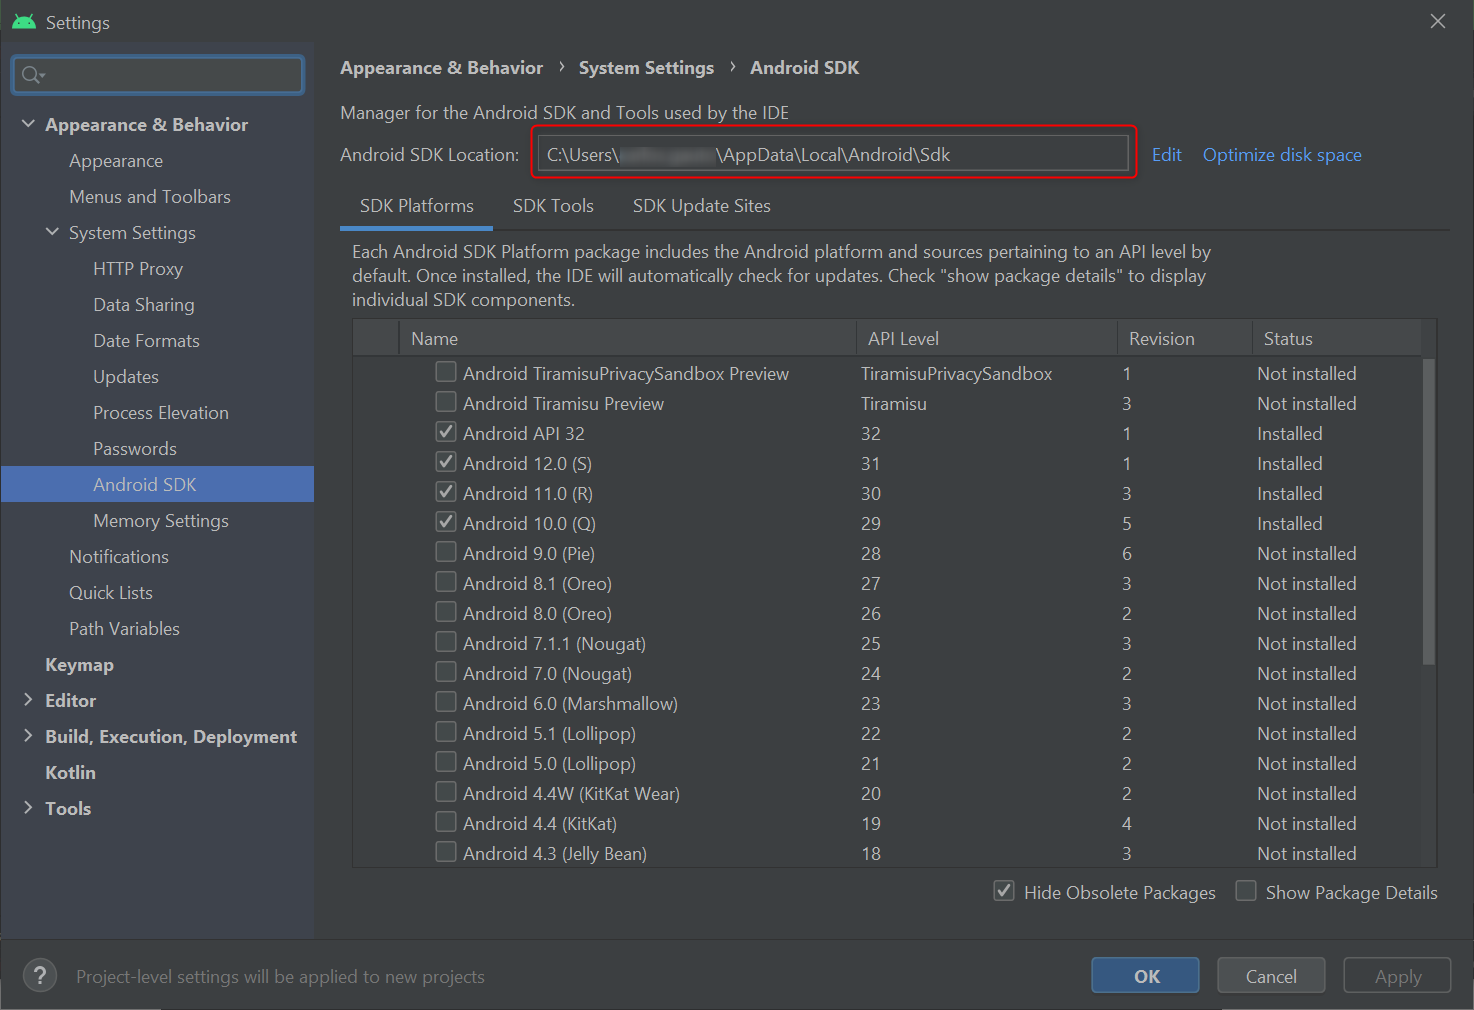
What is listed in Android SDK Location, is what we should have set in the ANDROID_HOME environment variable.
Environment variables on Windows

Additionally we have to add other variables, it is essential that the order below is respected.
Adding additional variables.
We must enter again to the user environment variables and select and then edit the PATH variable.
In the next screen we are going to create one by one the new variables in the following order:
%ANDROID_HOME%\emulator
%ANDROID_HOME%\platform-tools
%ANDROID_HOME%\tools
%ANDROID_HOME%\tools\bin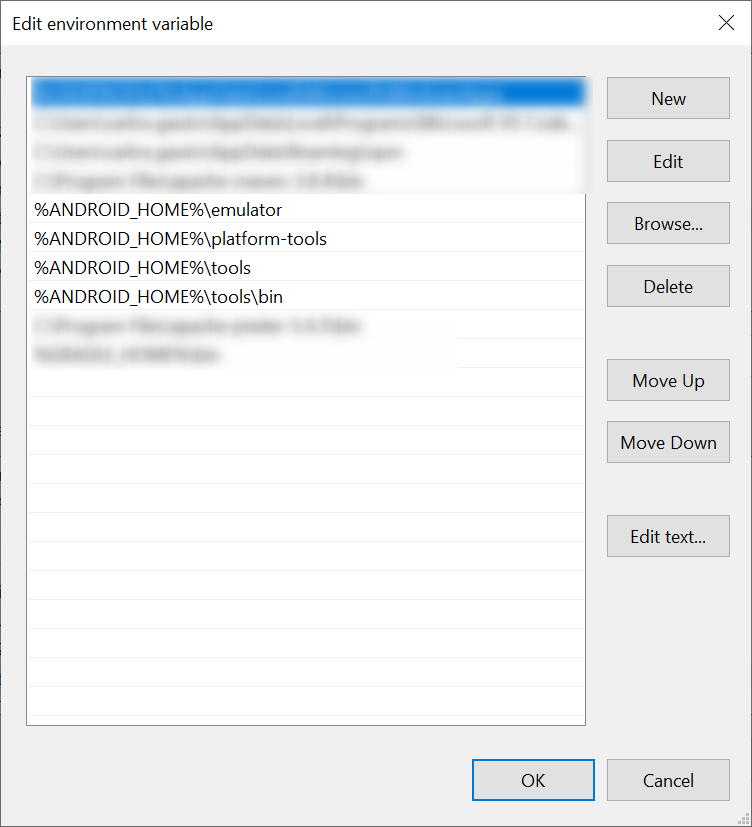
Inside the Android SDK menu, we are going to select the versions we need to use, for example in this screenshot you can see that we have selected and installed the API versions 29, 30, 31 that refer to Android versions 10, 11, 12. At the same time we have also selected the API Level 32 version.
In the SDK Tools tab, if you have not done so at the time of the initial installation, select and install minimally:
Android SDK Build-Tools
Android Emulator
Android SDK Platform-Tools
Intel x86 Emulator Accelerator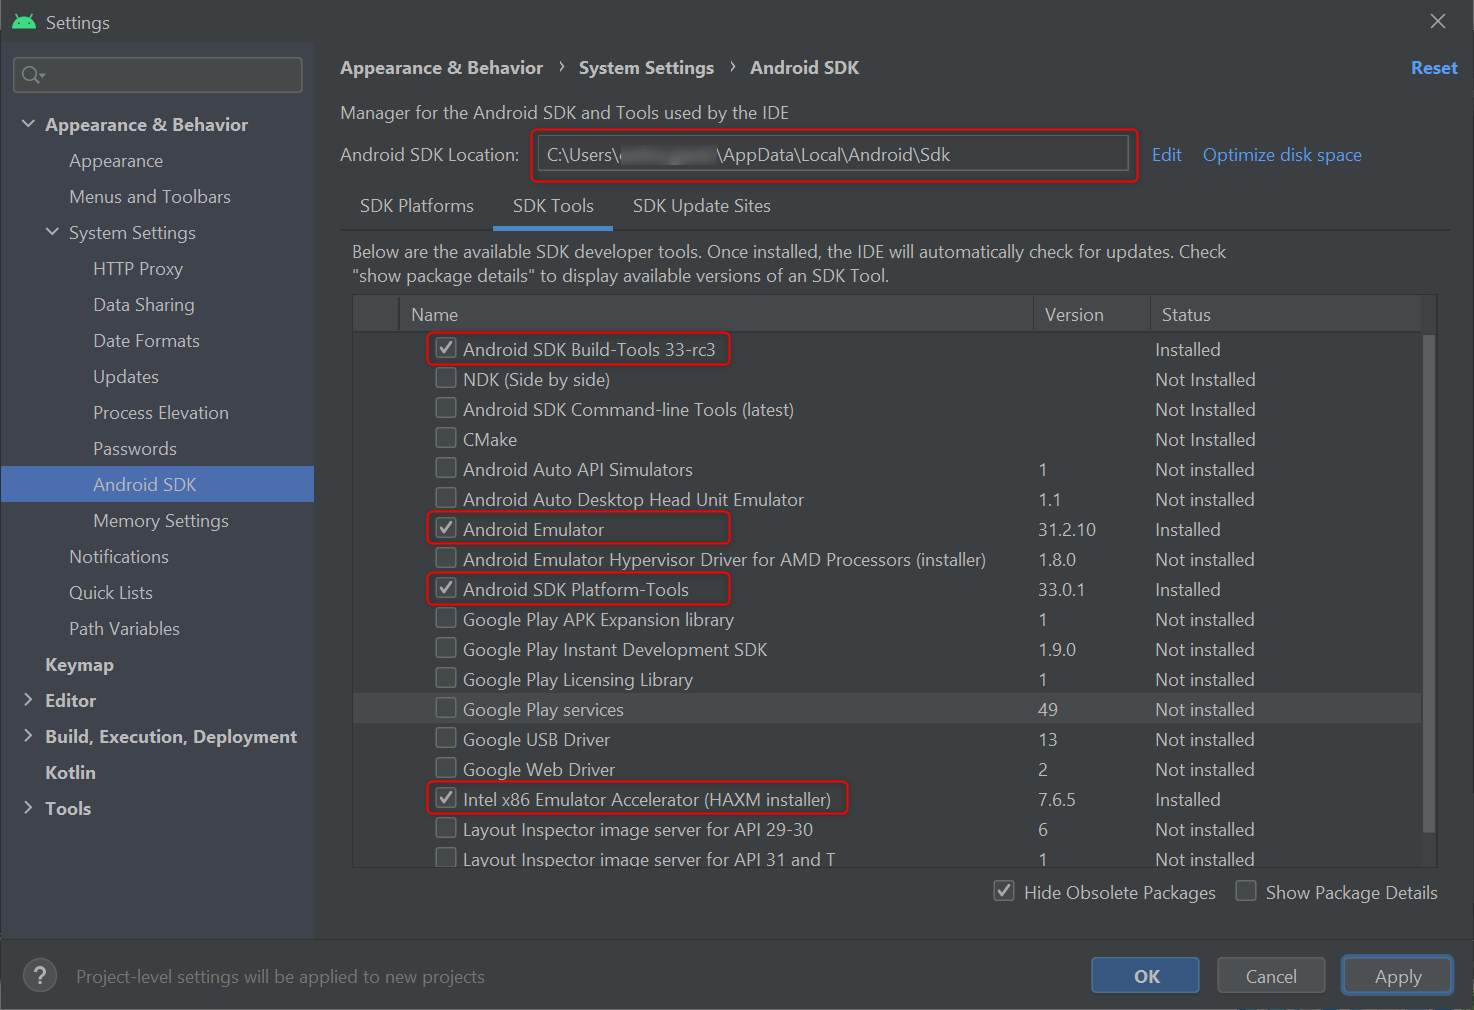
Creating an emulator
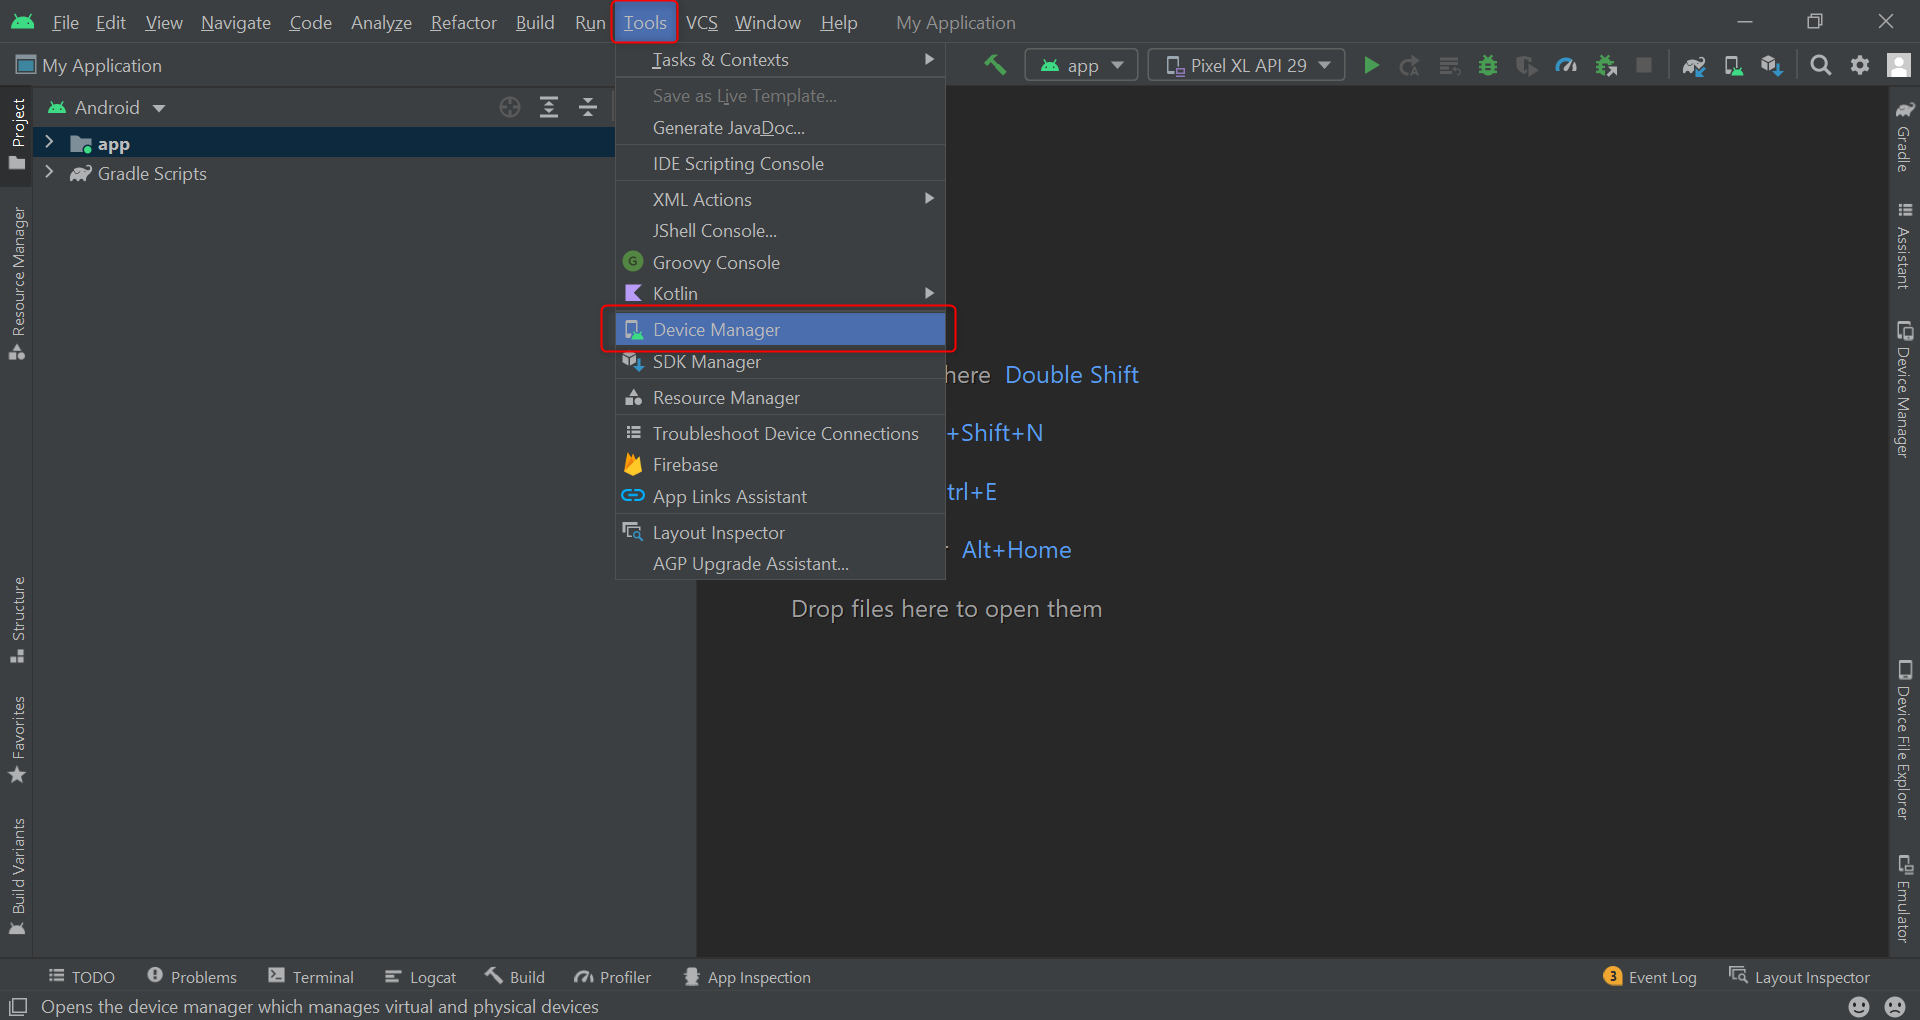
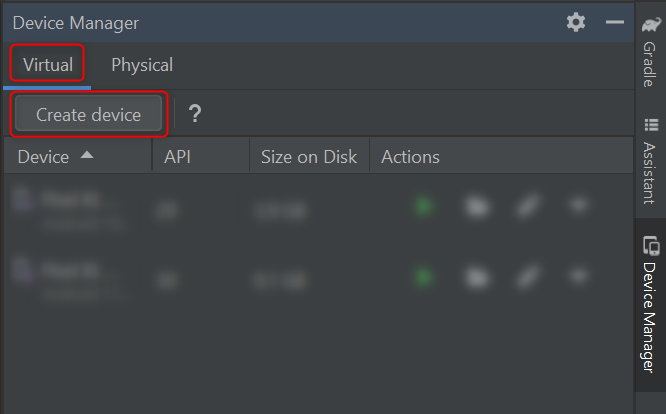
To create an emulator using Android Studio, go to the Tools menu and then to the Device Manager option.
After that we can access the Device Manager in which we select: Virtual and from there Create device.
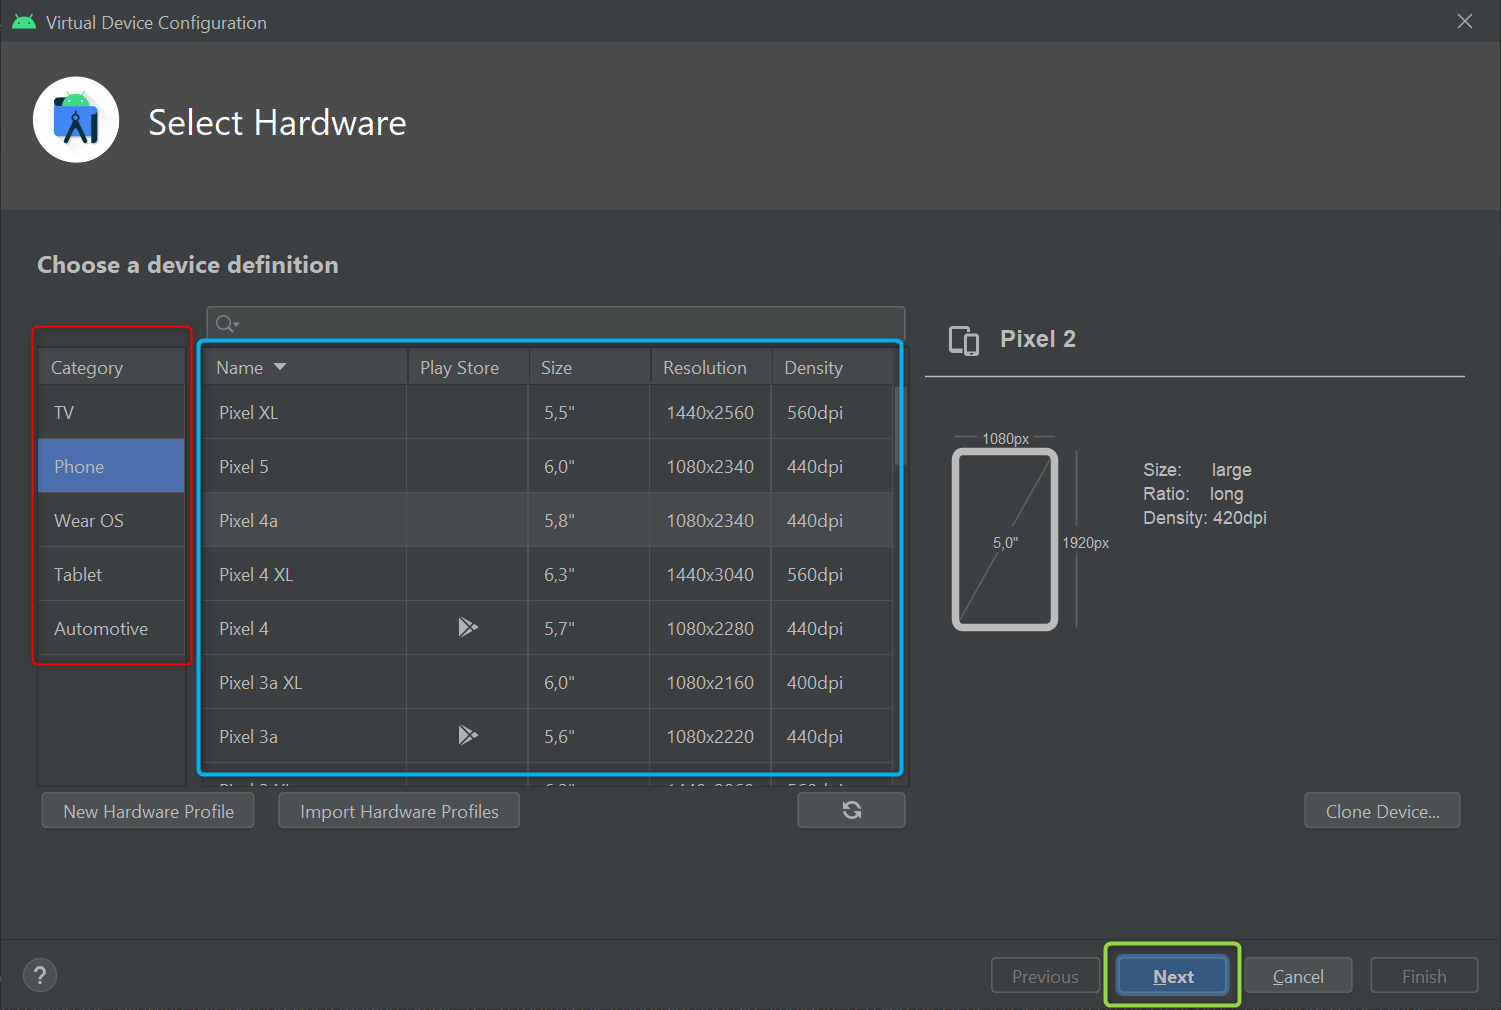
In the next box we have the possibility to choose the Hardware of our emulator, we will select the category and the device by its name.
As an example we will select Phone and Pixel 4a, but another combination could be selected according to the need. We can now press the Next button.
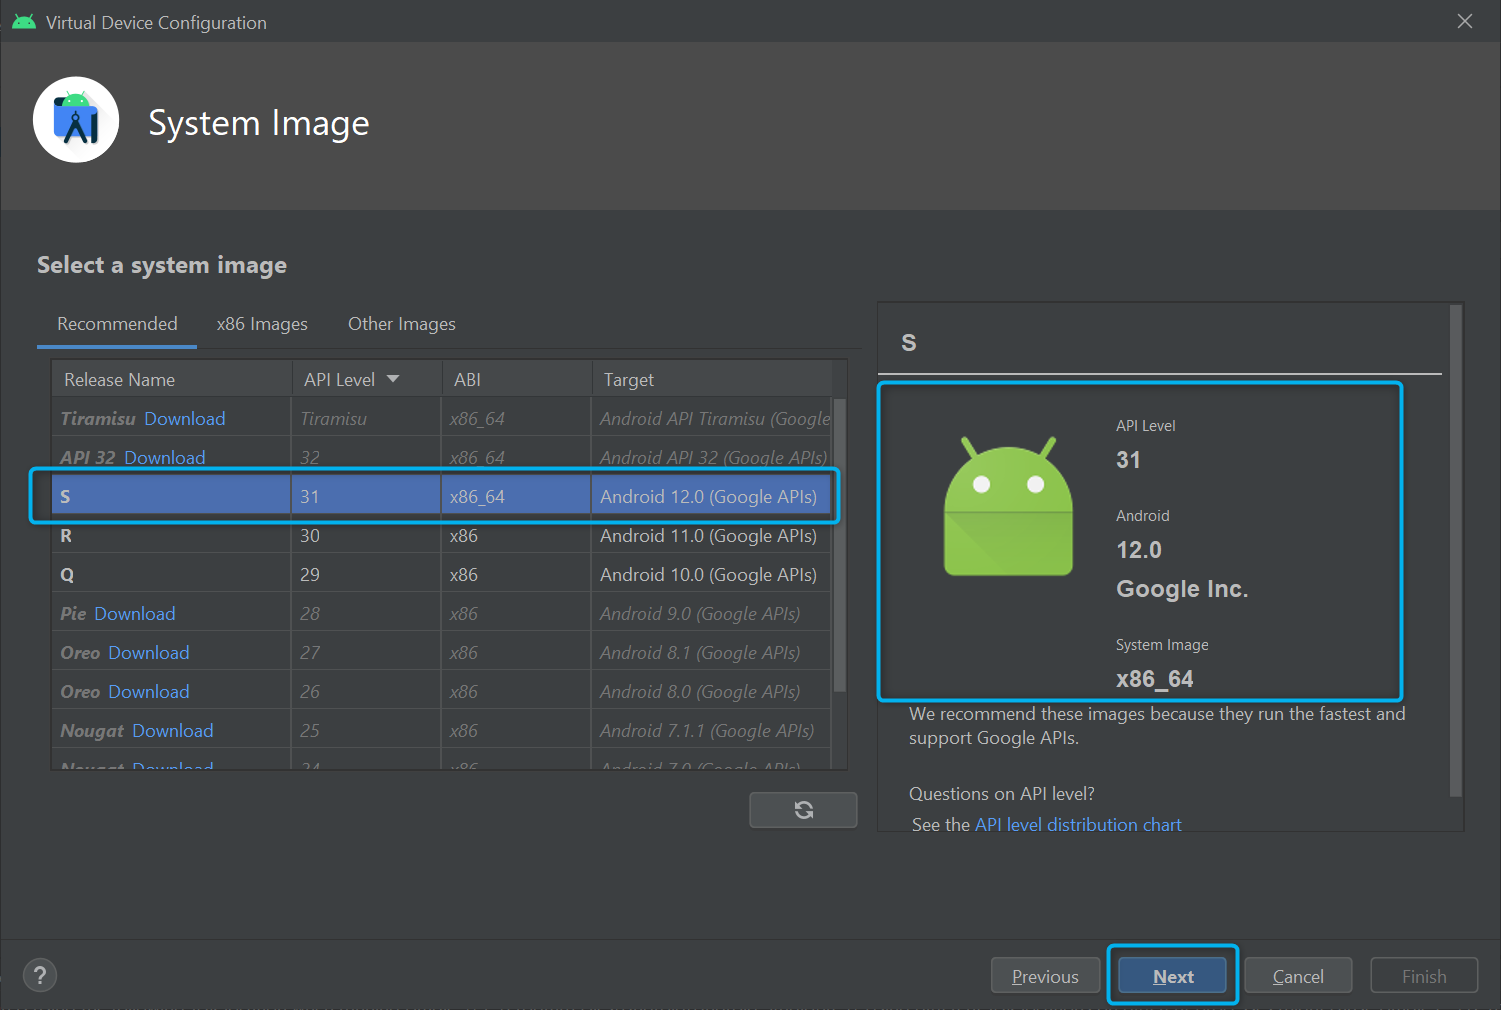
In the next screen we will be able to select the system image.
In case we have not previously downloaded, we will see the Download link in Release Name , it should be noted that we will not be able to move forward until we select a Release that we have downloaded to our system.
In the Target field we can see the Android version to use. For the example we will select Android 12.0, API Level 31.
In case we need a release that we have not yet downloaded, we will see a screen similar to the following one.
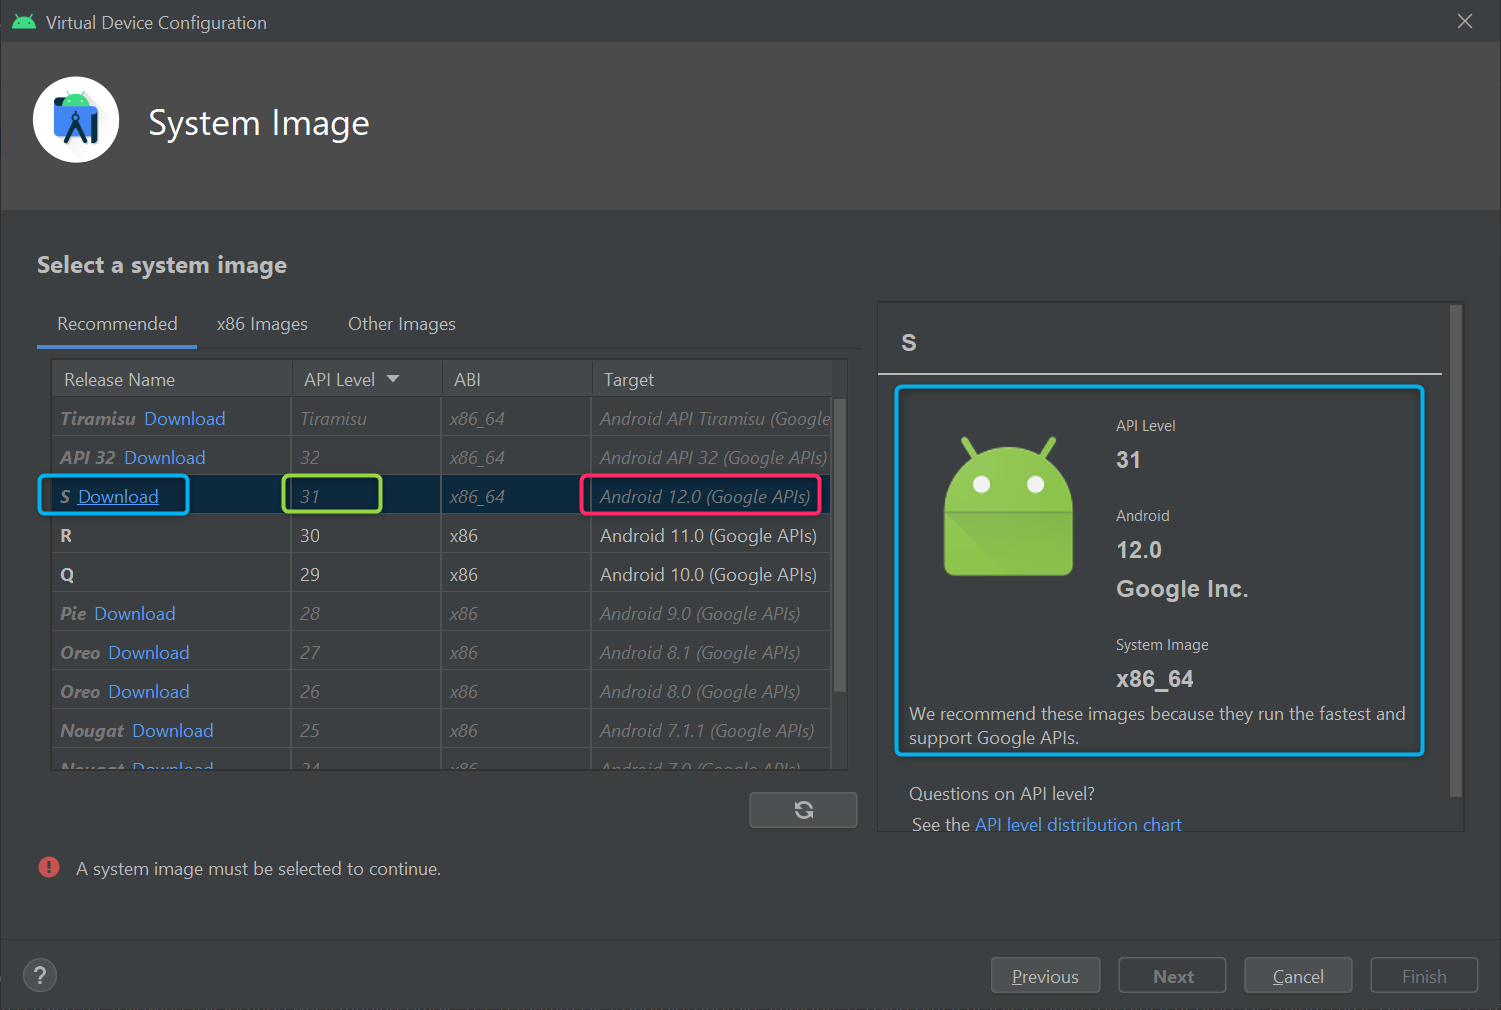
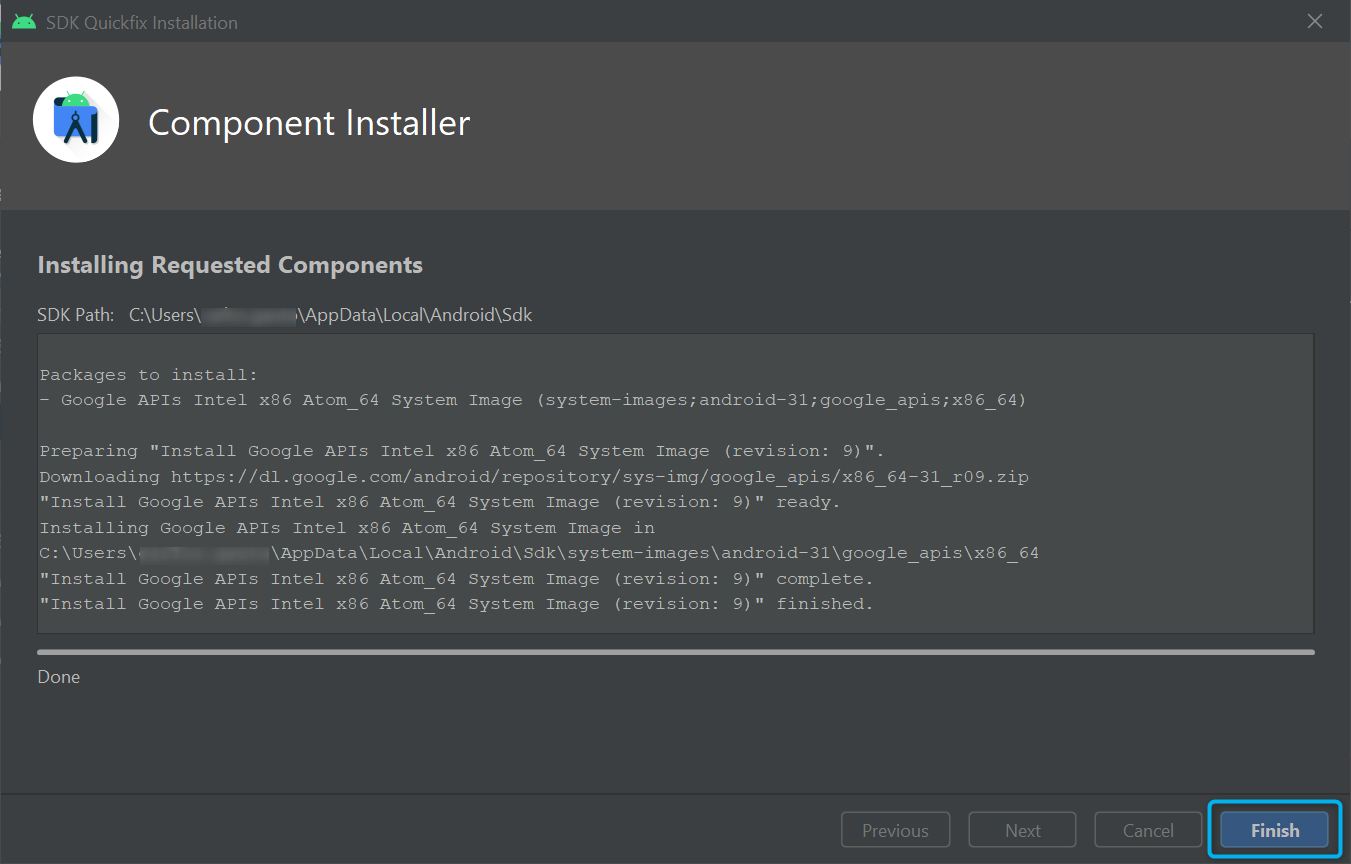
When you click on the Download link, the Component Installer screen will appear where you will see the respective download, once it is finished, the Finish button will be enabled.
Once the download is complete or if you have selected a component that you have already downloaded, the Next button on the System Image screen will be enabled, press it to continue with the installation.
Android Virtual Device (AVD)
On the last screen we can give a name to our virtual device and select the orientation.

When we press the Finish button, we will have the newly created device in the list of devices.
Starting our emulator from Android Studio.
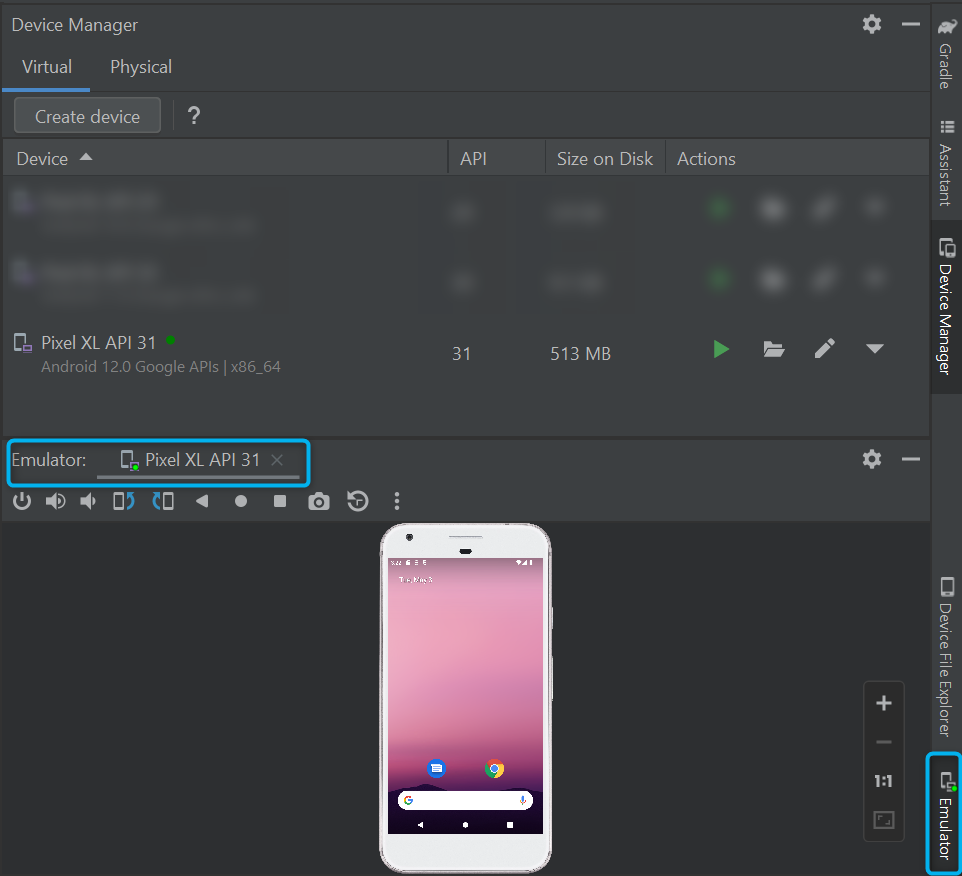
To start our virtual device, click on the first Play icon in the Actions section.

Finally, we can access the virtual device from the Emulator menu.
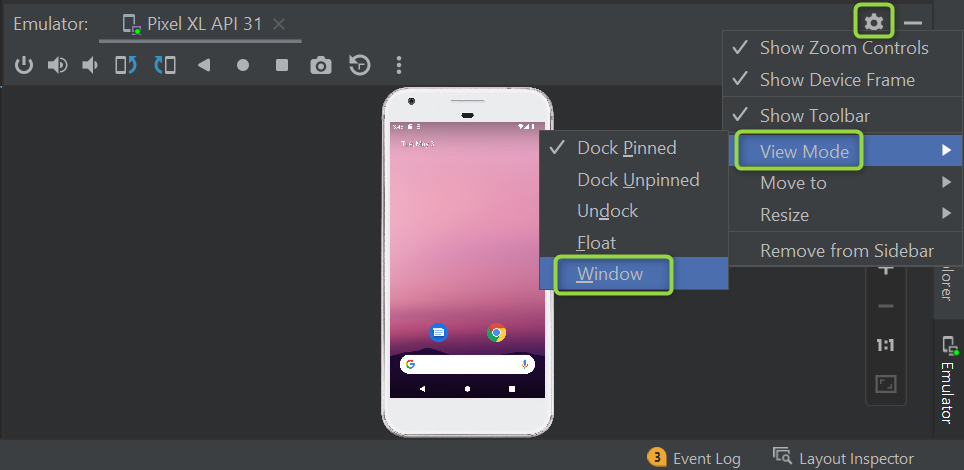
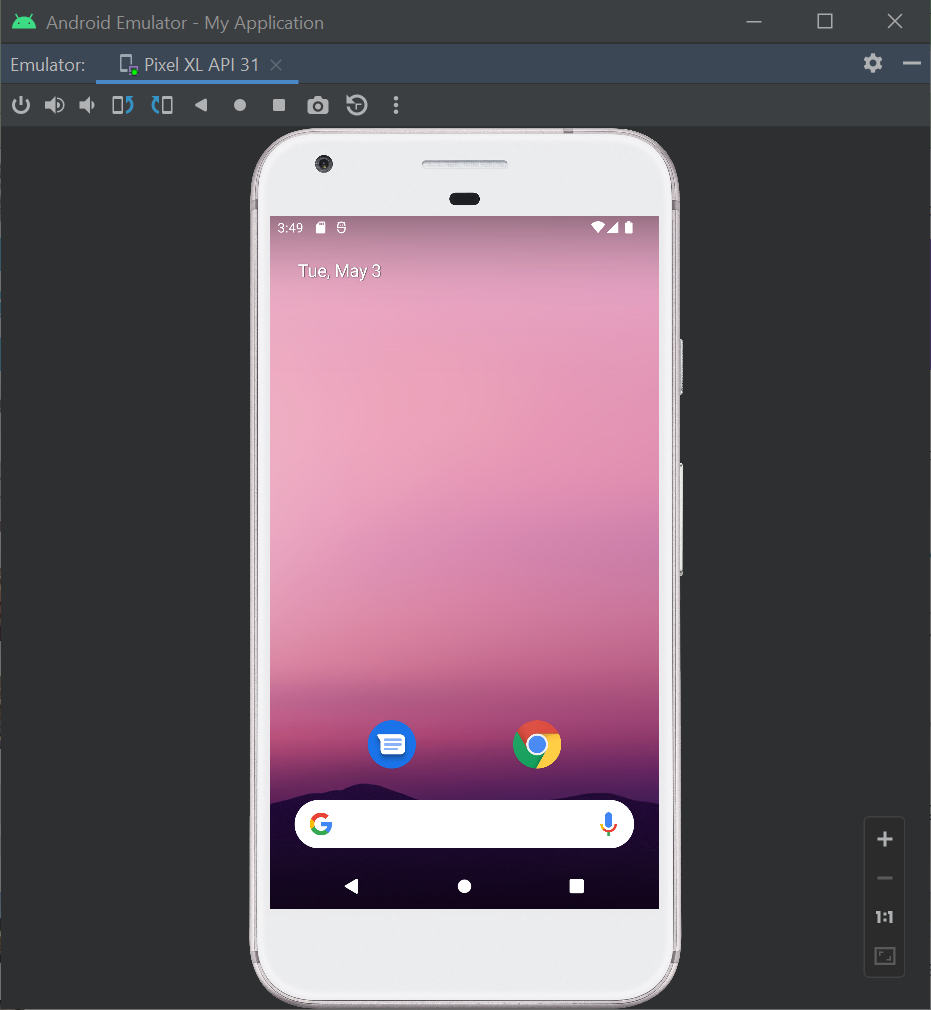
We can access the gear, then View Mode and select Window to decouple the emulator from Android Studio and have it as a separate window.
Starting our emulator from the command line.
As an alternative to initialising an emulator from Android Studio, what we can do is to create an executable file with a command that takes care of opening it without the need to access the IDE.
On Windows
We can create a file in a directory of our choice, for example with the following name: runEmulator.bat.
On Linux or MAC
We will need to create a file but with a .sh extension, for example: runEmulator.sh and make sure that the file has execution permissions, for more details on permissions on Linux/Mac see Chmod cheatsheet.
Assuming the emulator was created with the name Pixel XL API 31.
Inside that file let’s add the following line:
emulator @Pixel_XL_API_31After that, we can run our runEmulator.bat or runEmulator.sh file respectively to start our emulator.
If for some reason you get messages that emulator is not recognised as an internal command, I suggest you revisit the section on environment variables here Environment variables in Windows.
Appium
Appium Desktop
In order to download the latest version of Appium we will have to access the download repository of the project and download according to our Operating System.
Release v1.22.3-4 · appium/appium-desktop
Appium Inspector
What is Appium Inspector and what do we need it for?
In order to inspect the DOM elements when we need to perform Web Test Automation we usually use tools like DevTools or SelectorsHubs.
Similarly, in order to inspect and calculate the selectors for elements of our mobile applications we should use Appium Inspector.
In order to download the latest version of this software we will have to access the download repository of the project and download according to our Operating System.
Releases · appium/appium-inspector
Appium Doctor
Before everything fails, or even when everything fails. That’s where this great Doctor comes in.
Before running a hello world in Appium we need to avoid headaches and make sure we have the minimum requirements.
This NPM utility will guide us through the settings we need to have everything in optimal conditions.
Installing Appium Doctor
Appium Doctor is available in the public NPM repository, where you can find general usage documentation. To install it, run:
npm install appium-doctor -gRunning Appium Doctor
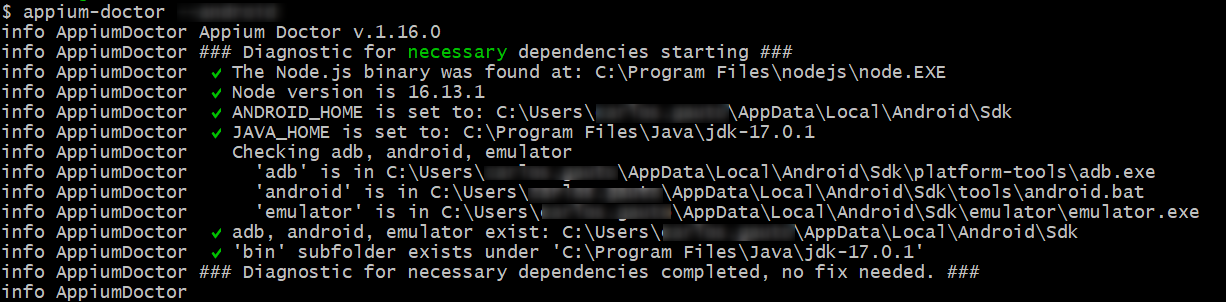
appium-doctorWhat minimum checks does Appium Doctor perform?
- Installation of NodeJS.
- Existence of
ANDROID_HOMEenvironment variable with the path to the respective SDK. - Existence of
JAVA_HOMEenvironment variable with the path to the respective JDK. - Existence of
binfolder insideJAVA_HOME. - Access to the
adb,androidandemulatorutilities.
If we have everything configured correctly, we will see messages similar to the following screenshot. By validating that all the necessary dependencies.
Conclusions
Preparing our local environment for testing on mobile devices can be very challenging and frustrating for even the most experienced testers.
We have to be patient and contemplate everything to do before we even think about which tool we will use to run our automated tests.
Have questions? Join our community on Discord
- Want to see this step-by-step in a video? We have a Youtube channel.
- Remember that we do livecoding, talk with guests and share nice moments on Twitch.
- If you liked this content, you can share it without problems, please remember to cite the source.
Big hug.
Charly